Canvas Student Guide
What is Proctortrack?
Proctortrack is the automatic remote proctoring solution your institution has selected for use during online exams. More information about Proctortrack’s privacy policies and technologies used can be found on our website.
How does it work?
The following guide will assist you, the student, in going through the process of taking a proctored exam with Proctortrack. If you have any additional questions, you can call 1 (844) 753-2020 or go to www.proctortrack.com/support for additional information and live chat.
Why onboarding?
Often students are unsure whether their specific hardware setup will allow them to use Proctortrack. While a detailed list of supported operating systems and browsers is available on Proctortrack.com, students often prefer to test their systems themselves. Keep in mind that Chrome and Firefox are the recommended browsers. While Proctortrack will work in other browsers, the user experience is far superior in Chrome.
The onboarding process gives students the opportunity to make sure everything is working correctly during low-pressure circumstances. It also gives students time to make any changes to their system well before the first exam.
Students can fail onboarding for the following reasons:
Missing or insufficient facial scan.
Missing or insufficient ID scan. (Name not legible, face not clear)
ID scan shows the invalid ID.
Insufficient environmental lighting.
If a student fails the onboarding exam, they will receive a notification listing the specific reasons for failure and be asked to re-take the onboarding exam.
For students, onboarding works exactly the same way as a normal exam. This will help familiarize them with the testing environment.
If you have any questions, please do not hesitate to contact Verificient support:
Proctortrack support: support@verificient.com, 1-844-753-2020
Taking an Exam with Proctortrack
1. Log in to Canvas with your email address (1) and corresponding password (2) before clicking “Log In” (3).

2. Navigate to the desired course by clicking on the corresponding colored tile.

3. On the menu on the left, click on "Proctortrack” (1), you get the Proctortrack Student Dashboard as shown below. Shown below is the Onboarding Tab, where you may start your Onboarding Test.

4a. On the top, you have the Onboarding status.The actual tests cannot be attempted unless the Onboarding profile is approved. An onboarding profile can be created by attempting the Onboarding test. The Onboarding test is a sample test.
Every Test-taker needs to have an approved Onboarding Profile, before attempting any actual Tests.

4b. On the Proctortrack Student Dashboard, you have the list of the test below. Click on the “Go to Test” button for the test you would like to attempt. Here we will first attempt the Onboarding test.

5. Read the “How it works” tab on the top, to further understand the steps required. Click the “Next” button to scroll through the steps.


6. Scroll down to go through the “Let’s Get Started” section, to understand the guidelines for a proper testing environment.

7. Scroll down further to find the "General Guidelines” section. These are generic exam guidelines for the test-takers understanding.

8. After getting familiar with all the guidelines, check the box (at the bottom) labeled “ I have read, understand, and will adhere to the required environment guidelines.” Click “ Go To Next Step.”

9a. This is the Download page. Proctortrack will attempt to automatically start the download. If it doesn’t, click “Download Proctortrack” to download Proctortrack manually. If the App was downloaded during any previous exams/tests, the download page will detect the downloaded app and bring forward a pop-up window to click on “open Proctortrack” to launch the application.

9b. Open the 'Proctortrack.zip/Proctortrack.exe' file that gets downloaded and launch Proctortrack to proceed.

Using Proctortrack:

Step 1: Go back to the browser (you can drag the app to the side).
Step 2: Click on the Connect to Proctortrack button.
Step 3: Come back here and click anywhere inside the app


2. A 7-point System Check will automatically run to verify that the system is ready.

Once the System Check is successfully conducted, click “CONTINUE” to start your onboarding. Follow the prompts till you reach the Face and ID scan. You will be prompted to verify your identity. Ensure to read the information provided on the screen, then click on Continue to proceed.


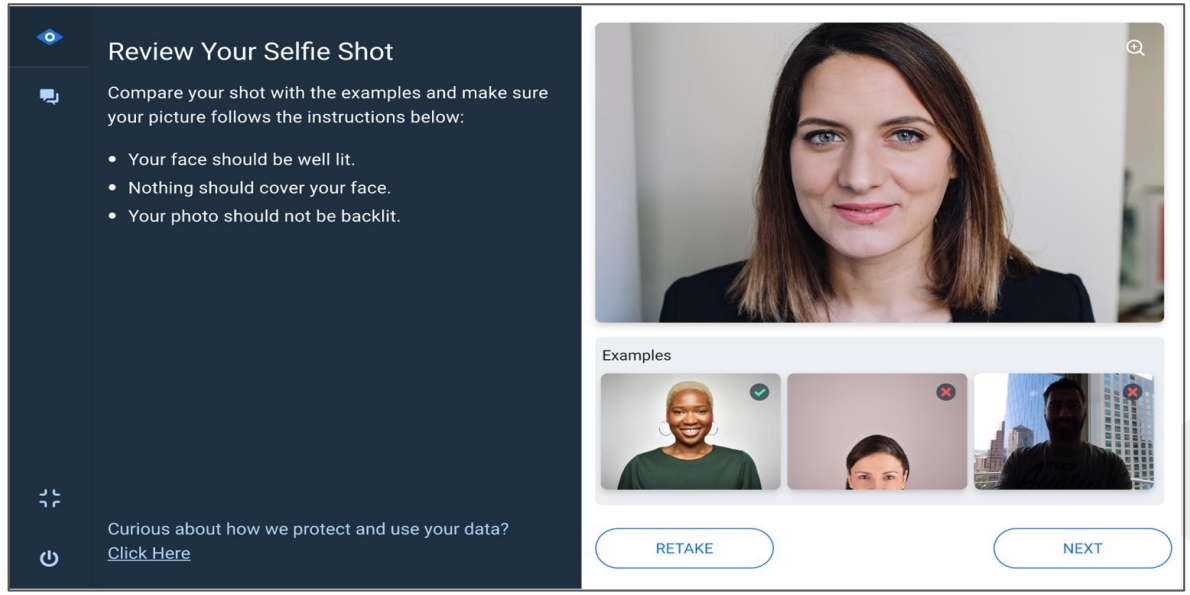
4. If the face scan is blurry click on Retake to capture again. Once the face scan is captured click on Next to proceed.
5a. You will now be prompted to complete the ID Scan. Make sure to Fit the ID within the frame in the correct alignment and hold it steady to ensure the text and your final ID scan is readable. Click Start Scan to proceed

6. If the ID scan is blurry click on Retake to capture again. Once the ID scan is captured click on Next to proceed.

7. For the knuckle scan, choose “Left Hand” or “Right Hand”, hold the back of either hand up to the webcam and try to fit it within the frame. Click “Scan”.
(Optional Step)***

8. Once the scan is complete, click “Re-Scan” if the scan is too blurry. Otherwise, click “Confirm” to complete the identification process.
(Optional Step)***

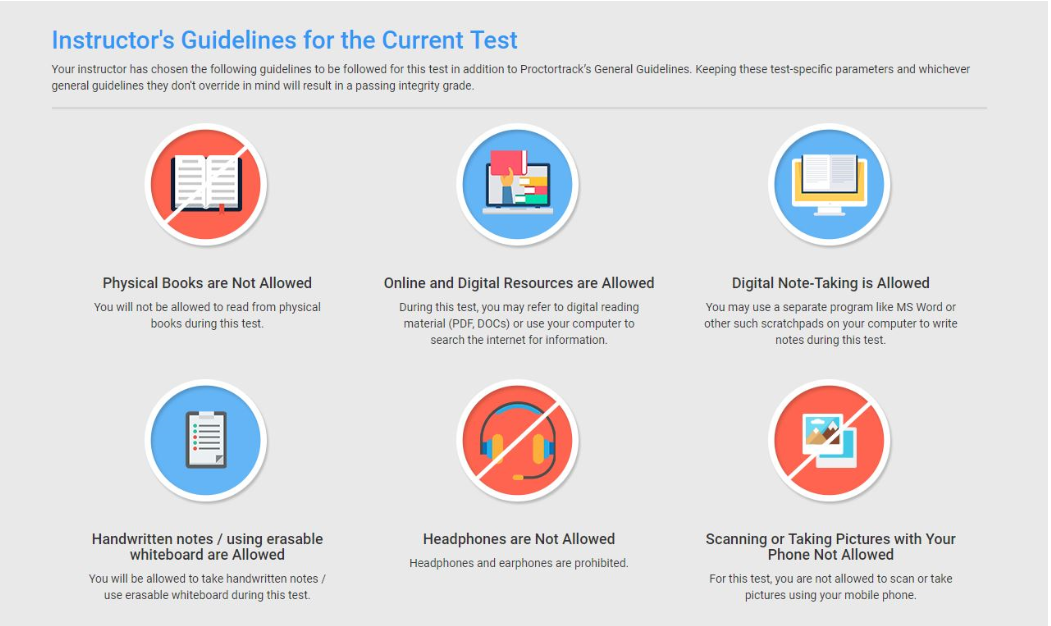
9. The Test Guidelines window shows the Proctoring or monitoring configurations and instructions on what is allowed during the exam. Read them carefully and click “START PROCTORING” to begin your proctoring session.

10a. Proctoring has now begun. A blue border will be placed around the screen as a reminder that Proctortrack is now in session. A prompt for the “Username” and “Password” should appear in the “AccessCode/Password”(1) displayed on the top right corner.
Once they’ve been entered into the text boxes (2), click “Submit”(3).

10b. Sometimes the access code is hidden(as per the configuration set by the instructor) If that is the case, follow the steps given below. You need to click on the “PASSWORD” present in the top right corner.


10. c) Once the password is copied, click “CLOSE” (1), and in the “Access code/Password”(2) field, right-click and then click “Paste”(or press CTRL + V in Windows/ Command +V for MAC OSX ) to paste the password for the exam. Click on “Submit”(3) to start the Test.

11. Take the test while adhering to the aforementioned guidelines. After the test is complete, it’s very important to remember to submit the test by clicking the “Submit Quiz”(2) button. Then Click the “END” (3) button on the top right corner to end the proctoring session.
(1) You have the video window in the right corner. You may click on the Hide button to hide the window

12. Check the box next to “Yes, I have completed and submitted my test.” Finally, click “End”.

13. The session data will be automatically uploaded to Proctortrack.

14. The test session is complete! Both the buttons visible here will close Proctortrack. Proctortrack will have to be run before each proctoring-enabled test. Click “QUIT APP” to save the application for use with later tests, or click “Uninstall” to remove Proctortrack from the current machine. Keep in mind that an opportunity to download Proctortrack will be given before each proctoring-enabled test.

1. Once the Onboarding is submitted, and is under processing it shows on the Proctortrack Dashboard as below.

2. Once the Onboarding is passed, the status on the Proctortrack Dashboard indicates the same. The Student will be able to take the Actual tests (the tests become active) once their Onboarding is passed.

3. The Students can view their Onboarding scan data under the “Onboarding” tab. They can click the “arrow” to scroll through the Face, ID, and Knuckle scan. The Onboarding tab clearly shows the date of the Onboarding as well as the Expiration date (each profile is valid for 1 year). The Students also have the option to take the Onboarding by clicking on the “Retake Onboarding Test” link.

4. To attempt any actual tests, the students are required to click on the “Go To Test” button for that particular test. The steps after that are the same as shown above (step 5 onwards).
